Hey Pretty

  • Home
  • Blog
  • About Me
  • SHOP
    • INSTAGRAM
    • SALE FINDS
    • MAKEUP
    • ADDED TO MY CLOSET
  • Contact
  • Home
  • Blog
  • About Me
  • SHOP
    • INSTAGRAM
    • SALE FINDS
    • MAKEUP
    • ADDED TO MY CLOSET
  • Contact

Snapchat Filter Halloween Costume DIY

10/26/2018

1 Comment

 
Picture
Hi friends!
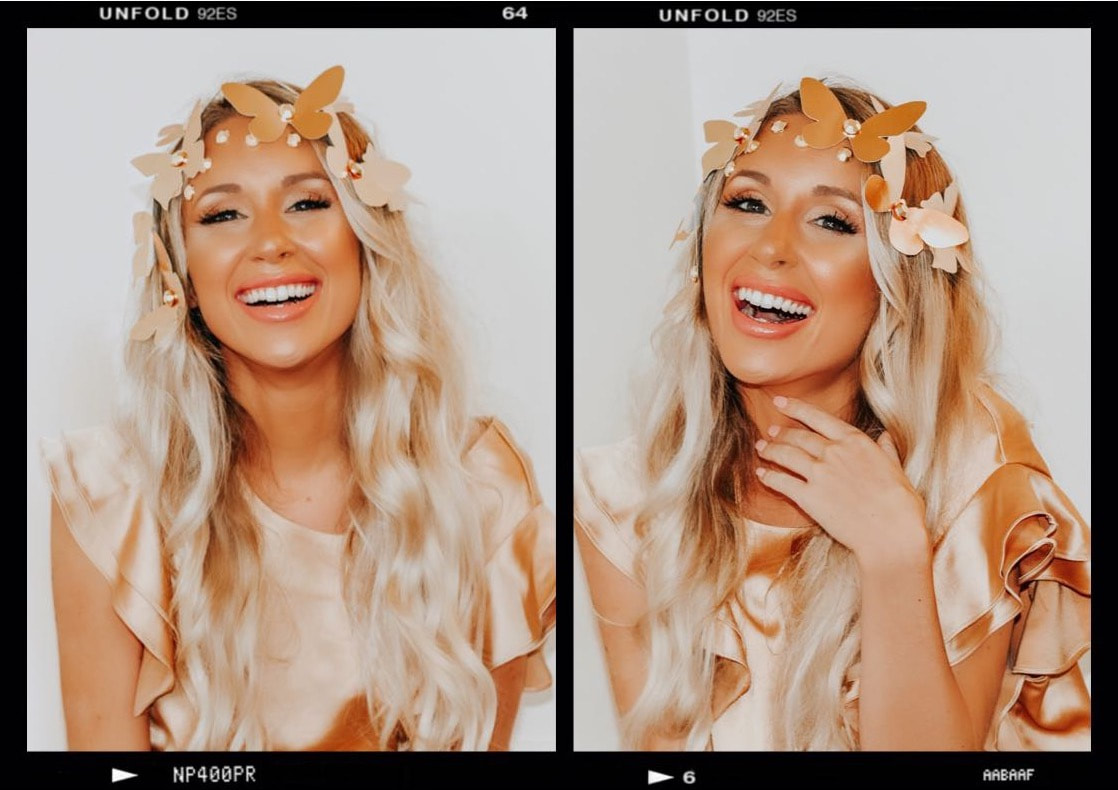
Can we believe it's almost Halloween?! Which means its Nearly NOVEMBER? WHAT?!?
Well in case you're like me and last time you looked at the calendar was Oct. 1st and you're scrambling for a last minute costume, well then you're in the right place! I gotchu girl!

A few years ago I had the bright idea of being a cute little deer for halloween. I made a set of antlers on a headband and added these pretty little pink flowers to make it look whimsy and cute. Well, to my surprise everyone that night came up to me and said, "OMG YOU'RE A SNAPCHAT FILTER, HOW CUTE!" Uhhh, no I'm a deer, but thanks, lol. Those silly millennials (... I'm clearly a millennial too guys, lol).
SOOOOO, that got me thinking, why not BE a snapchat filter this year! Of course I love a good filter, but there are a few that I absolutely LOVE and my life is made when they reappear on the app. Those handful of faves consist of that one that looks like vintage film, the gosh awful one that makes your mouth huge (that's my alter ego lol), and the pretty bronzy one that gives you gold butterflies and sparkles around your head ??  Needless to say, who wouldn't want to be bronzy and tan and sparkly and have shimmering butterflies sworming around their head on Halloween?! I mean that just screams, "YASSSS!"
(Ugh here I go embarrassing myself again).

Anyways, I'm going to show you how to be the Bronze Butterfly Goddess (that's what we are gonna call her... and by "her" I mean the filter lol) for your last minute DIY Halloween costume. Honestly, this is NOT a hard costume, so if you're DIY challenged, don't you worry, YOU GOT THIS!

HERE'S WHAT YOU'LL NEED
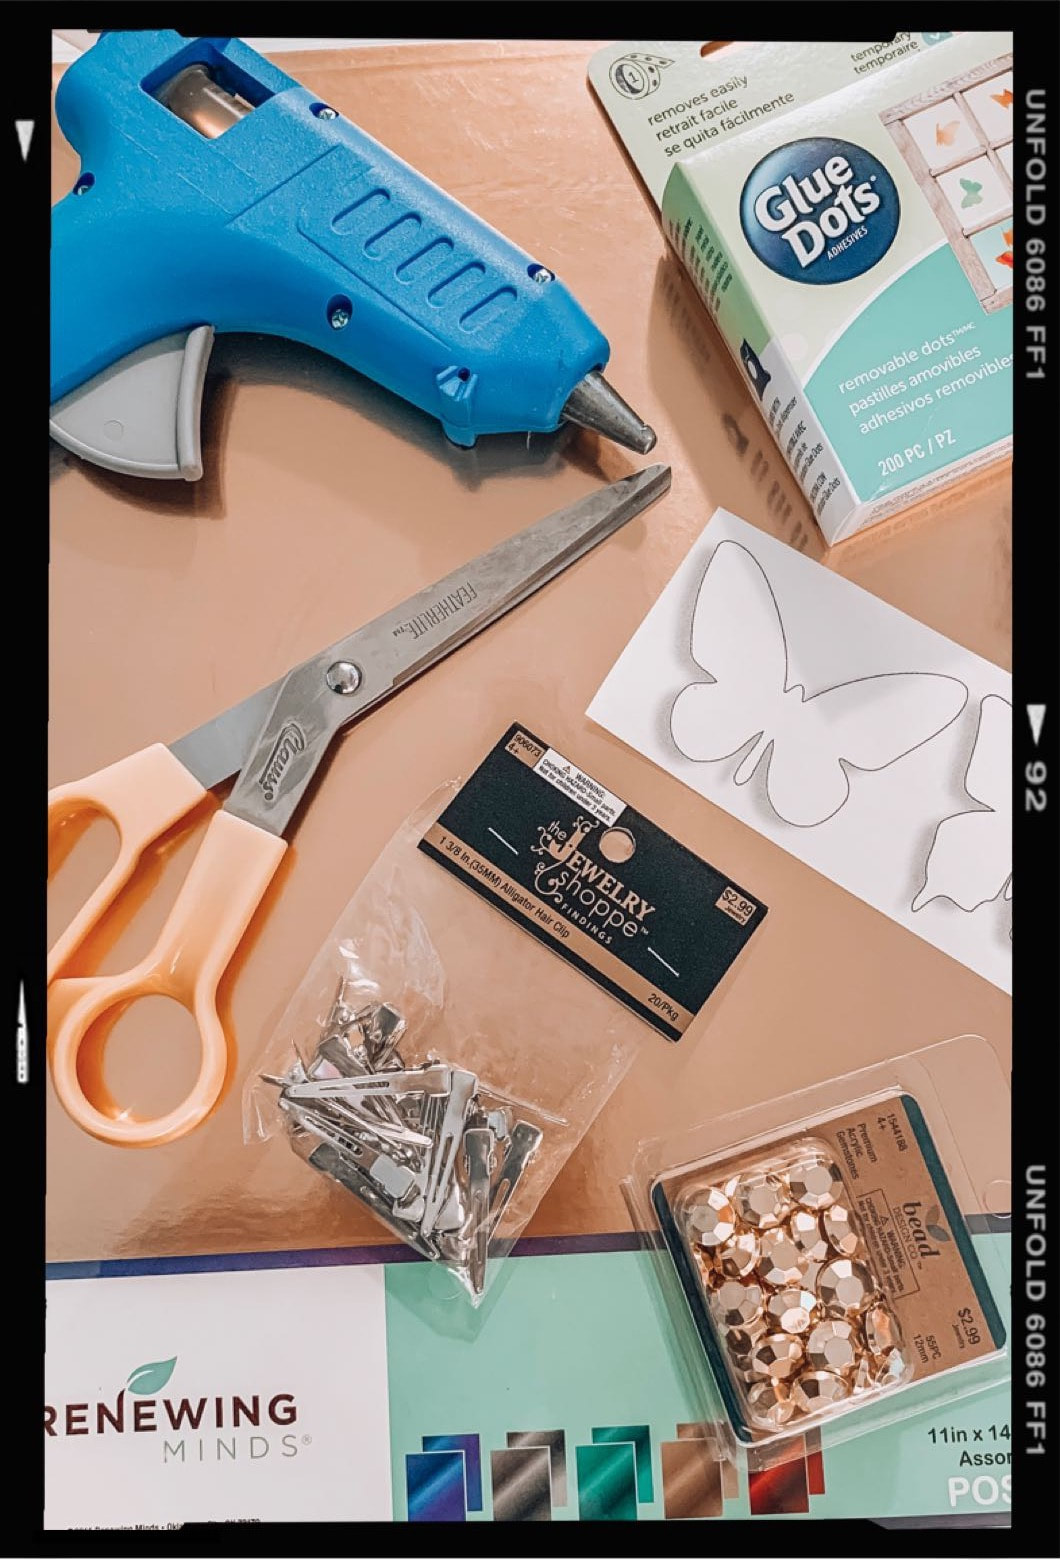
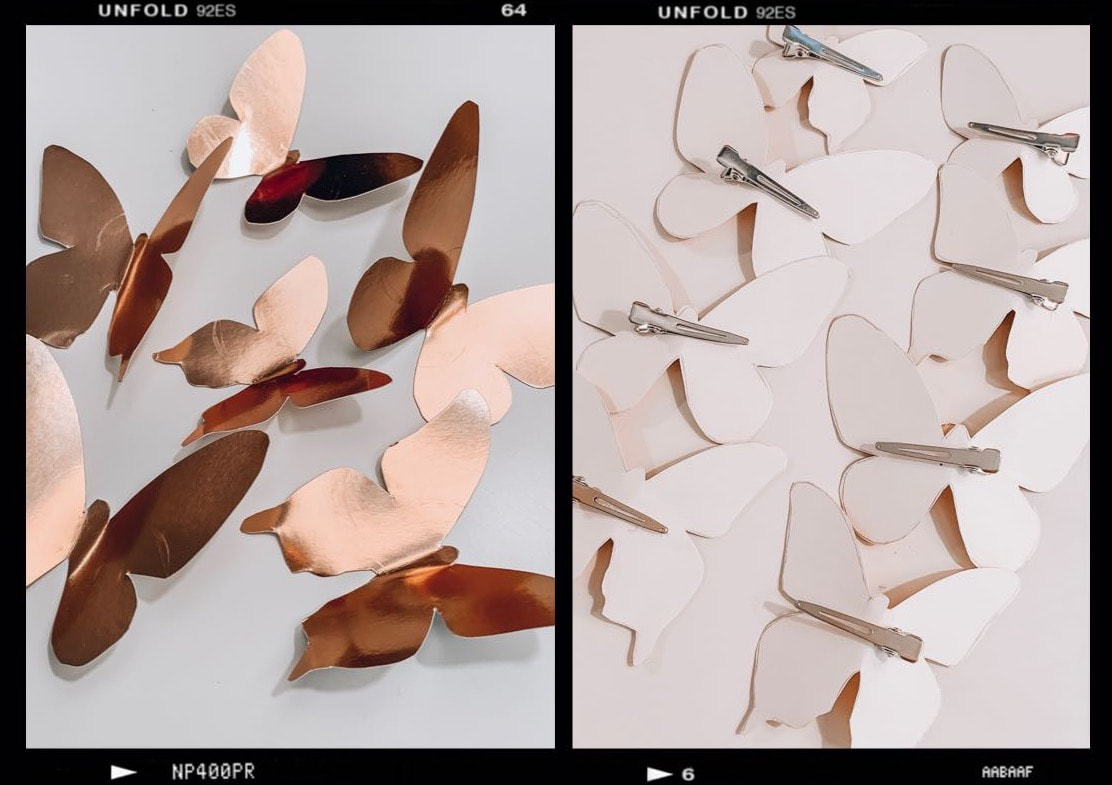
  • Foundation (1-2 shades darker than you usually use)
  • Matte or Shimmery Bronzer
  • Highlighter
  • False Lashes & Lash Glue
  • Hair Clips
  • Gold Cardstock Paper
  • Gold Stones or just regular Rhinestones
  • Sticky Dots
  • Hot Glue Gun
  • Printer or a really good freehand of a butterfly... or I suppose a butterfly stencil would work too, haha.
Picture
Foundation
I am using THIS in Shade 332

Bronzer
I am usingTHIS bronzer in Shade Chocolate Matte, AND THIS bronzer in Shade Deep Tan (good drugstore option).  
(I will be using both,  but I totally think you could get away with just using one or the other, if you don't want to spend the money)
Highlighter
I am using THIS Palette, and I am using the gold color that you can see is clearly my favorite in the pictures to the left, lol.
THIS is also great drugstore option if you don't want to buy an entire palette.
LASHES
Some of you may already have lash extensions, or super long lashes, or just hate wearing false lashes, so this is of course an optional step, but I'm using THESE
​
( I think my package is a different color because it's an old pack, lol)
Picture
Hair Clips
This is how we will be attaching the butterflies to your head, lol. I got THESE clips. The package contains 20 clips, and I don't think we will be needing any more than that... or maybe we will... ?
Gold Cardstock Paper
This is basically what you use for scrapbooking. I got 2 sheets of THIS. You want to buy this yardstick kind so that it is thick enough to hold up when you glue the butterflies to the clips.
Gold Stones or Rhinestones
These are going to go on your face and on the butterflies :) I can't seem to find the ones I bought to link for y'all, but snagged them from Hobby Lobby.
THESE are also a great option and very similar!
Sticky Dots
This was the best option I could come up with to attach a rhinestone to your face, haha! But if you have a better solution, be my guest girlfriend! I used THESE
Hot Glue Gun
We will use this to glue the butterflies to the hair clips. Don't worry I'm not going to make you use this to attached the rhinestones to your face, lol. You're welcome :)
Any glue gun will work!
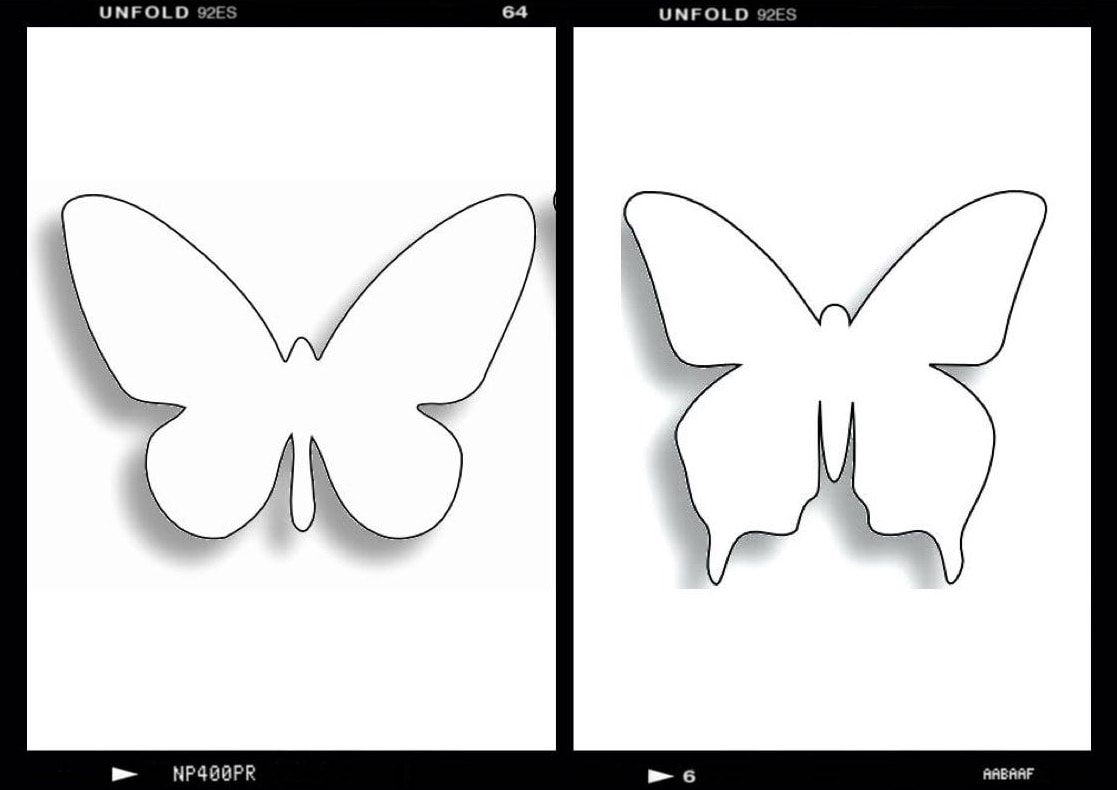
Stencils
I printed out the butterfly outlines you see below. I printed both styles in a large and small size. I then traced 3 large in both styles, and one small in both styles, for a total of 8 butterflies!
Picture
Picture

HERE'S HOW

  1. Print out a picture of a butterfly of your choice. I used the stencils above, but up to you. Or use a butterfly stencil, OR even freehand if you can.
  2. Trace your butterfly on the back of your gold card stock. I did 8 butterflies: 3 large in each style, and 1 small in each style. Now cut out your butterflies!
  3. Lightly fold your butterflies down the middle to make them look 3-D.
  4. Use your glue dots to add your gold rhinestones to the butterflies, if you wish.
  5. Hot glue your butterflies to your hair clips. Think about how you want them to be positioned in your hair and how the clip will attach so that your butterflies are facing the right way and such. Let the glue dry (I would recommend letting these dry for a solid 12 hours before putting them in your hair.... just sayin' haha!)
  6. Now let's start your makeup. Use your darker foundation and then do your makeup as usual... 
  7. THEN go in with your new bronzer and bronze your entire face... not kidding, lol. THEN go back and add extra bronzer to the low points of your face: hairline around forehead, along the little line under your cheek bones that has a shadow when you make a fishy face (lol), under your chin and neck, sides of nose.
  8. Once you're a bonze goddess, let's highlight! Highlight now on the HIGH points of your face: right down the center of your nose (be careful with this step- too wide of a stripe can make your nose look wider), on the highest point of your chin, cupid's bow, tops of cheek bones, directly under your brows, and in the inner corner of your eyes.
  9. If you're using false lashes, apply them now!
  10. I didn't mention this above, but use a lip color that has some shimmer/glitter to it to complete the bronzy look. I'm using THIS in shade Velvet Teddy, with THIS gloss in shade Fancy Nancy, on top. Apply your lippie!
  11. Now you're gonna use your glue dots and stick your gold stones along your forehead. Don't get the extra sticky dots, or you might be wearing rhinestones to work on November 1st ;)
  12. FINAL STEP!!!!!! Clip in your butterfly clips, and that's it! And promise me you've waited several hours for these things to dry... I don't want any lawsuits, lol.
Picture
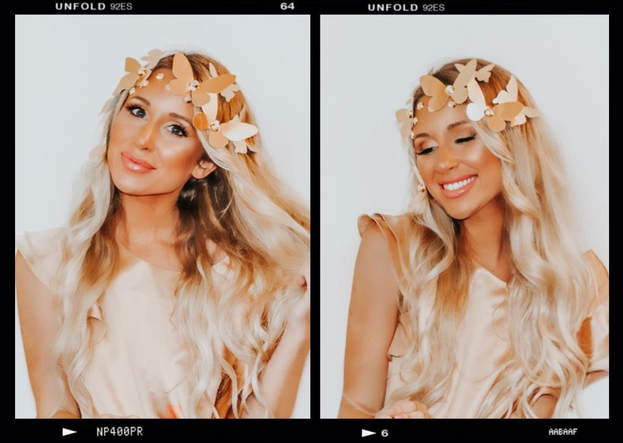
Y'all are going to look beautiful and bronze and sparkly, I can't wait! If any of you use this costume idea, please tag me! I want to see! Have a wonderful and safe Halloween!
xoxo,

Kayley

1 Comment
Juan Martinez link
9/8/2019 09:01:24 pm

Thank you for the great post. I like the way you describe the content. The points you raised are valid and suitable.

Reply


Leave a Reply.

    Picture

    STAY CONNECTED


    Picture

    Picture
    Picture

    SEARCH THE SITE


    Picture

    Picture

    STYLE

    HEALTH

    BEAUTY

    TRAVEL


    CONTRIBUTOR

    ShopLaceBoutique.com

    SHOP
    MY INSTA

    Picture

hey pretty_logo
I hope I've inspired you to feel as pretty as you are.
Connect on social media for more pics and tips from my shopping, dressing, and accessorizing adventures!

HOME

BLOG

ABOUT ME

CONTACT